Root & Install TWRP On Nexus 5 Android M
Today in this guide we’ll show you how to root the Nexus 5 running on Android M . If you are looking for the guide to root your phone. Here in this tutorial we’ll show you how you can do this in easy way. Once the device is rooted you can enjoy Custom ROM, mods, and tweaks.x
WARNING!
WARNING!
Your warranty is void if you follow the given instruction in this guide. We the Howtorootmobile.com team or the developers are not responsible for bricked devices, dead SD cards. Read all the instruction very carefully and Perform everything at your own risk.
CHECK PHONE MODEL
This guide is only for the Nexus 5 android smartphone. Don’t try this method on any of other Android devices, It may hard brick your device. So, first confirm your phone model number in your android phone settings. To do this Go the Settings page of your device and check out the “About Device” option.
PRE-REQUISITES AND REQUIREMENTS
Before following the below Mention guide, It’s always recommended to follow our pre-requisites and requirement to stay safe.
1. BACKUP YOUR ANDROID DATA
Do take the Full Backup of your Android Apps, SMS, Contacts, Call Logs, Bookmarks. This one is one of the most important steps that you have to follow, as we don’t want anyone losing their personal data or apps.
2. INSTALL NEXUS DRIVERS
First you need to Setup ADB and Fastboot Drivers on windows PC. This will help you to send basic Linux commands and a variety Android specific commands from PC to connected Android devices
Now you need to install the USB drivers to connect your device with the computer to follow this guide. Without these USB drivers, you can’t connect your device to the PC, first download and install these drivers on your system.
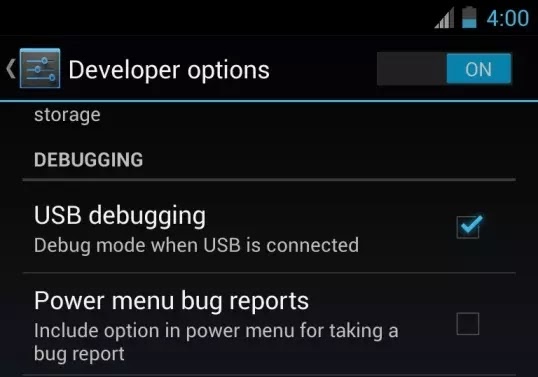
3. ENABLE USB DEBUGGING MODE
Now you need to enable USB debugging mode. Without enabling USB debugging mode on your device, you can’t start the root, Custom ROM or Unlock process.
4. CHARGE YOU ANDROID
If your device switched off during this process, it could damage or brick the device. Make sure that your Android battery is full charge or near about 50-70% battery level.
After following the above mention steps follow the below mention guide one by one to proceed with the tutorial. All the above mention steps are very important, so do follow all the steps and do exactly what is told.
HOW TO INSTALL TWRP ON NEXUS 5
Step 1. First you have to install the TWRP recovery on Nexus 5. To do this, you need unlock bootloader device, If you already done that, then check out the next step.
Step 2. Download the TWRP Recovery for Nexus 5 here and rename it to recovery.img
Step 3. Now download the ADB and Fastboot file here to run the commands on your PC. Extract the folder on your desktop.
Step 4. Now move the recovery image file that you downloaded on step 2 to the ADB folder.
Step 5. Now boot your Nexus 5 in bootloader mode. To do this Hold Volume Up Key + Volume Down Key and then press the Power button.
Step 6. Connect your phone to the PC with USB cable and open a command window inside the folder where all your ADB and Recovery files are. For this “Shift + Right click” on any empty white space inside the folder and select “Open command window here” from the context menu.
Step 7. Now enter the following command and run it:-
fastboot flash recovery recovery.img
Step 8. TWRP recovery will now be installed on your Nexus 6.
ROOT NEXUS 5 ON ANDROID M
Step 1. Now the TWRP is installed on your phone, now you can root your phone.
Step 2. Download the below mention files on your phone.
Despair kernel | File: Despair.M.HH.R1.5.zip
SuperSU beta v2.49 | File: BETA-SuperSU-v2.49.zip
Step 3. Now boot your phone in recovery mode. First Power off your device first. Now press and hold volume up + volume down + power button together until you see anything on screen. Now phone is in fastboot mode, form here press volume down two times to reach recovery option, and then press the power button to select it and boot into recovery mode.
Step 4. Flash custom kernel first. On the main menu of TWRP recovery, select Install. Select the custom recovery file (Despair.M.HH.R1.5.zip) and then use ‘Swipe to Confirm Flash’ option at the bottom of the screen to flash it on the device.
Step 5. After this flash, SuperSU file the same way you flashed the custom kernel above.
Step 6. Go to back to recovery’s Main menu, select Reboot » select System.
Now the phone will reboot and rooted.


Comments
Post a Comment